Showing posts with label Halloween. Show all posts

Wednesday, October 31, 2012

Monster Booties!

Hello, and Happy Halloween!

Are you ready for Halloween?

I think I am as ready as I am going to be. :o)

I didn't get my wreath done, but I did get all my Halloween goodies sent to the nieces and nephews.

Yay!

I love making goodie bags!

It gives me a perfect excuse to browse all of those fun Walmart and Target aisles. :o)

Anyway, while I was making these I came to the realization that when it comes to goodie bags the Wee Baby Caleb often gets jipped.

I felt bad about this because even though he might not remember that he got jipped...I will.

So, I decided that he needed something for Halloween too.

Now, this was one of those out of the blue kind of thoughts that just kind of materialized into...

Monster Booties!


Cute, huh!

They were pretty simple to make too.

I started with THIS free Bootie Pattern and Tutorial created by Dorothy of Come What May, and Loving It.

First, I cut out my pattern pieces.


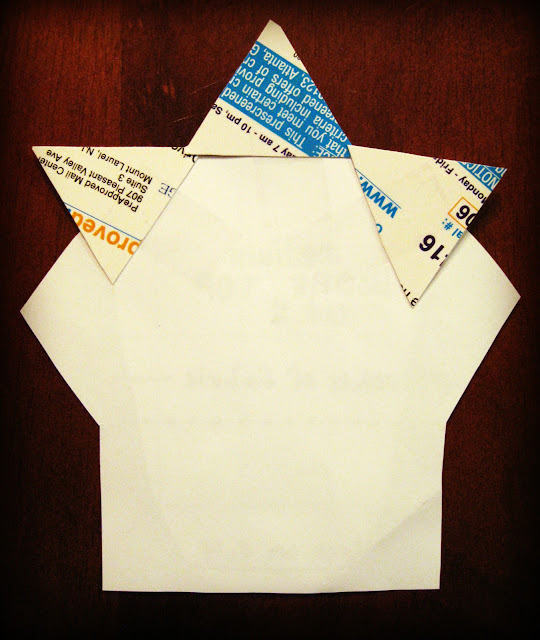
Then, I used a piece of junk mail to cut some triangle toes, and taped them on to the Bootie Sole.


I turned the Bootie Sole upside down...


And lined up the Bootie Top with the Bootie Sole.


Then, I added some more triangle toes to the Bootie Top making sure they all lined up.


After adding all the toes your pattern pieces should look like this.


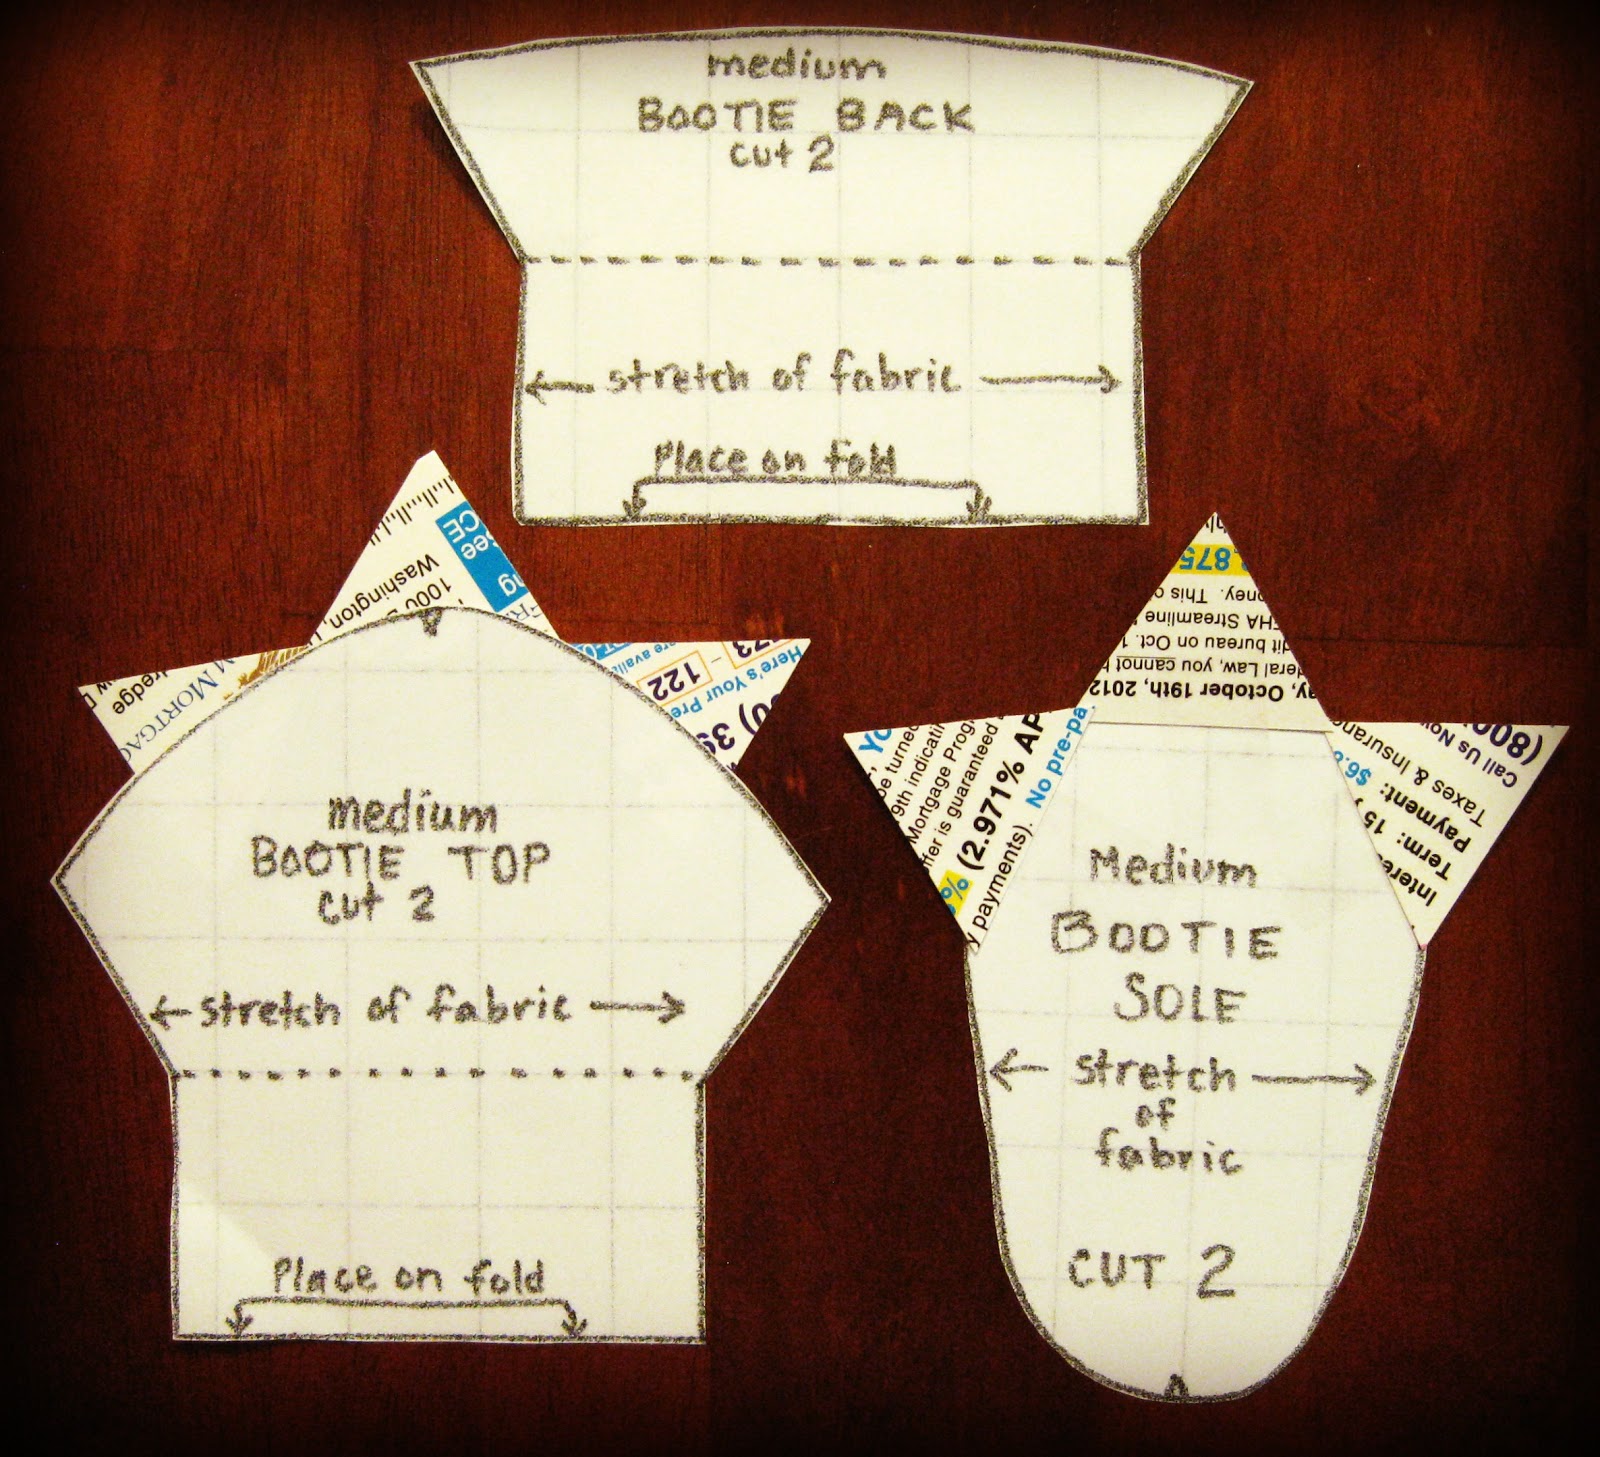
Now, just cut out your fabric, and follow Dorothy's Tutorial.


Quick Note: I didn't add a non-slip sole to my booties, but you could if you wanted to.

Anyway, it was actually a really quick sew, and I was so happy with how they turned out.


Now, I just hope the Wee Baby Caleb likes them :o)


Happy Wednesday, and Happy Halloween!  


Pin It!

Thursday, October 25, 2012

Monster Peep Hole!

Hello, and Happy Thursday!

Random question: do you remember when I Framed my Peep Hole?


Well, did you know that N8dogg had to install that peep hole himself, and that we are the only people on the block that have one?

Yep, it's true, and while I love having a peep hole I don't love that it has taken away my ability to have a front door wreath. :(

Now, as you may or may not know I am kind of obsessed with wreaths...

Random side note: I am just finishing a cute Halloween wreath that I hope to post about tomorrow.

Here's a sneak peek:


Yay!

Anyway, so my peep hole is hampering my wreath obsession, and friends it has not been good.

I keep seeing all these cute wreaths on my neighbor's doors, and it makes me sad.

So, I decided I needed to do something about it. :o)


TA-DA!

Monster Peep Hole!


Cute, huh!

Oh, and it was super easy to make.

I found the Monster image on PicMonkey, and just like my Peep Hole Frame I cut it out with my Silhouette CAMEO.


See, so easy, but so cute!

I think I may have found my new "go to" Holiday Decoration. :o)


Happy Thursday!  

Pin It!

Wednesday, October 17, 2012

Halloween Distressed Subway Art!

Well, Hello!

I know, it's been FOREVER!

I am going to spare you the details of my "Oh, So Crazy Life", and just say that I am happy to be here today. :o)

Anyway, since it's getting closer to Halloween I thought I better start getting some of my Halloween projects done, and this was first on the list.

Halloween Distressed Subway Art!


Remember my Weekend Memories with Subway Art...

Where I used Delia's Distressed Canvas Tutorial to make some distressed Subway Art.

Well, after that I became slightly obsessed with making them, and decided that I need a Halloween version. :o)

I found this Super Cute Free Subway Art Printable over at That's What Che Said...

Gathered my supplies, and got to work.

I started with an 8x10 canvas...


And some Golden Regular Gel.


Since this stuff can be kind of tricky see Delia's Complete Tutorial before using it. :o)

Next, I printed off my Subway Art.


Make sure to print your image in reverse if you are going to be transferring it to anything. I have made that mistake one too many times.

Oh, and again read Delia's Tutorial all the way through for tips on printing your images because this will only work with images printed with Toner.

Ok, so once you have everything all together you can start transferring.

I started by painting an even layer of the Gel onto my canvas.

Then, once it was coated I took my printable and sprayed it with a little water.


Next, I put it face down onto my canvas, and smoothed out all the bubbles.


Now, it's time to wait.

I usually just let it dry overnight, and make sure it is completely dry before working on it the next day.


Once it is completely dry I spray some water over it, and start to slowly rub off the paper.


You will want to do this process two or three times depending on how much paper comes off each time.

This was after the second time...


And this was after the third.


Some of the image may come off in more areas than others depending on how evenly your Gel was painted on.


I liked mine really distressed, but if you don't just make sure your Gel is painted on REALLY evenly. :o)

Ok, so once most of your paper is rubbed off you just finish it with another coat of Gel or Mod Podge.


However, I went one step further, and gave it a coat of Glitter Glue. :o)


TA-DA!


I really liked how it turned out.


What do you think?

Happy Wednesday! 


Pin It!

Monday, October 31, 2011

Happy Halloween!

Do you like my so called costume?


I decided to try a few new tutorials
(well, new to me),
and it just...kind of...fell together. :o)


I did a little freezer paper stenciling...


Tutorial found HERE at MADE.
 

Made some arm warmers from a pair of socks...


Tutorial found HERE at I AM MOMMA HEAR ME ROAR.


And a super cute, super easy, Big Bow...


Which I decided to make my own tutorial for.

Yay! 

1. I cut a piece of felt in to a 9" X 8" rectangle, but you could use any dimensions you would like.


2. I folded the rectangle in half.


3. Then I sewed around the border, and through all the corners, leaving a small opening in the front.


4. I clipped the corners.


5. Then turned it right side out, and put a little hot glue on the opening.


6. I pinched the center until I got the look I wanted.


7. Then wrapped a scrap of felt around the middle, and hot glued it together.


8. For the final step I added an elastic band on the back, but you could easily add a clip or pin if you wanted.


And there you have it! A super simple, super cute, Big Bow!


Hope you have a Happy Halloween!

Oh, and if you are looking for the perfect treat for tonight, try making some of these...


Cute, Huh! And they were really simple. I found them HERE at FAKE GINGER.


Have a Happy Halloween! 


Pin It!

Wednesday, October 5, 2011

Commitment Issues and BATS!

-->Our house has officially been invaded by BATS!

 
-->
OK, so not the creepy gross kind of bats, but cute glittery foam bats instead. 

-->You see, I have commitment issues when it comes to hanging stuff on our walls. I want to hang up cute fun stuff, but just can never seem to get around the whole having to put a hole in the wall thing to do it.  

-->However, yesterday I was in Michael’s and saw these glittery black and purple foam bats on sale for $3.99 and it hit me, foam! Foam would be perfect to hang up on my walls because no holes, nails, screws, or commitment needed. Yay!  


-->Now, what was I going to use to hang them up? I thought about using double stick tape, but the bats seemed a little too heavy for it and I wasn’t sure if it would stick to my walls very well. -->So, while I was on my lunch hour I wandered around JoAnn’s trying to find something that would work when I found these…

See, REMOVABLE. No commitment needed!

Yep, Removable ZOTS! How awesome is that!


I just applied 3 ZOTS to the back of each bat and stuck them up on the walls, and that was it!


The orange lights on the banister give them that awesome glow!

Now just add a few more Halloween things...

Like some Spooky Spiders...


And some Trick or Treating Ghosts...

And you're all set!

Happy Friday!
Pin It!